
Blog
QuickBooks CSV Import | How to Format and Upload Bank Transactions Correctly
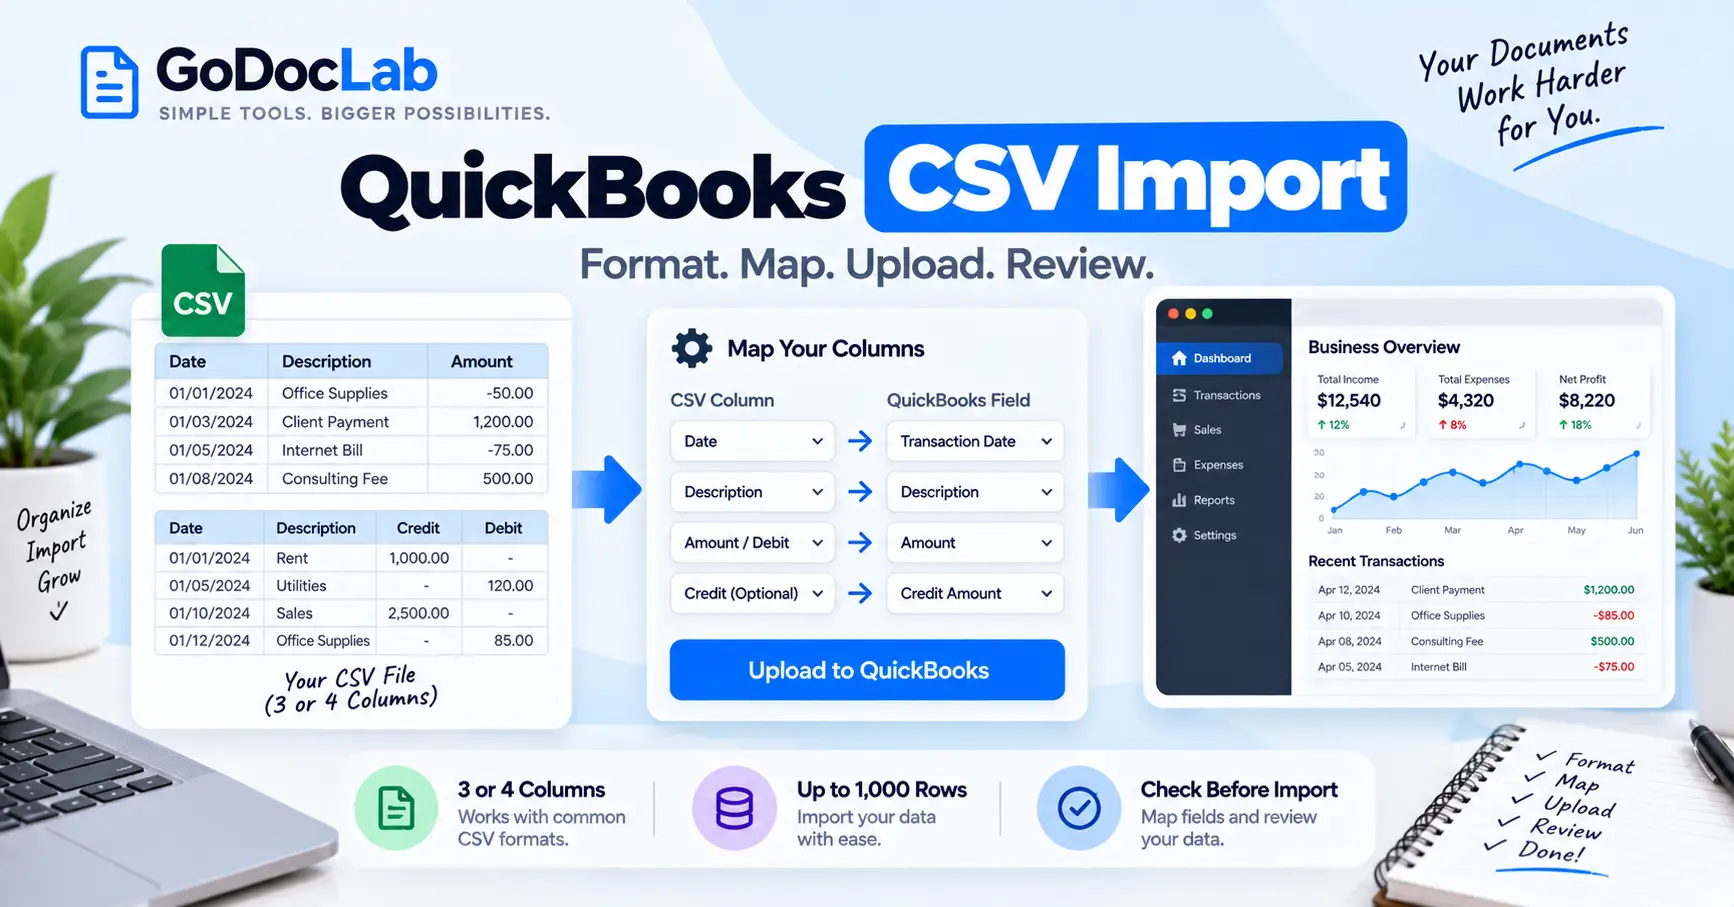
A QuickBooks CSV import can save hours when you need to add bank or credit card transactions that are not already in QuickBooks Online. It is useful for older transactions, accounts that are not connected to bank feeds, or records you exported from another system. The process is simple once the CSV follows the format QuickBooks expects.
The trouble usually starts before the upload, not during it. A wrong date format, extra column, missing amount, or mixed debit and credit structure can stop the file from working. This guide shows how to prepare the CSV, upload it, fix common errors, and turn PDF bank statements into usable CSV data when needed.
Quick Answer: How Does a QuickBooks CSV Import Work?
A QuickBooks CSV import takes transaction rows from a comma-separated values file and adds them to a bank or credit card account in QuickBooks Online. Intuit’s current US guidance says transaction-list CSV files should be in English, can contain up to 1,000 transaction lines per upload, and must currently stay at or below 350 KB.
The basic job has three parts: prepare the file, map the columns, and review the transactions before adding them. QuickBooks asks you to match your CSV fields with its own fields, which is why simple column names make the job easier. If the file looks like a spreadsheet had an argument with five different accounting systems, clean it before uploading.
QuickBooks CSV Format Requirements
Intuit currently supports two common CSV layouts for bank transactions in QuickBooks Online. One uses three columns, while the other separates money in and money out into four columns.
For a QuickBooks CSV import, use one structure consistently from top to bottom. Do not mix an Amount column with separate Credit and Debit columns in the same file unless the current QuickBooks mapping screen supports the exact structure you created. Intuit’s own guide shows the 3-column and 4-column formats as the standard layouts for bank transaction uploads.
Use Clean Column Names Before Uploading
Column names should make the mapping screen easy to read. Intuit recommends keeping the required information clear and says incorrect mapping can stop QuickBooks from reading the data correctly. Its current error guide suggests removing unneeded columns and using titles that match the QuickBooks fields where possible.
For a QuickBooks CSV import, extra columns such as page number, statement title, opening notes, or bank address usually add no value to the transaction upload. Remove them from the working copy while keeping your original file safe. Fewer columns mean fewer chances to map Description to Amount by mistake, which is the accounting version of putting salt in your coffee.
Check Dates Before the QuickBooks CSV Import
Date formatting causes many upload problems because banks and spreadsheet apps do not all write dates the same way. Intuit says dates should use one consistent format throughout the CSV, and its current US guide recommends checking that days of the week are not mixed into the Date field.
A QuickBooks CSV import works better when every transaction date follows one pattern. If one row says 08/24/2026, another says 24 Aug 2026, and a third adds MON, clean those values before upload. The goal is boring consistency, which is exactly what financial data likes.
Handle Debit, Credit, and Amount Values Carefully
The 3-column format uses one Amount column, while the 4-column format separates Credit and Debit. Intuit also notes that some credit card exports may display signs differently because payments reduce a credit card balance. That is why you should upload the file to the correct QuickBooks account type and check several rows before confirming the import.
During a QuickBooks CSV import, never assume a negative value always means the same thing across every bank or account type. Compare the CSV with the source statement and check deposits, purchases, refunds, and card payments. One reversed sign can turn money going out into money coming in, which makes the numbers look cheerful for all the wrong reasons.
How to Upload CSV Transactions Into QuickBooks Online
Intuit’s current QuickBooks Online process starts in Accounting and then Bank transactions. From there, you can choose Upload from file, select the correct QuickBooks account, map the columns, choose the transactions, and confirm the upload.
Use this checklist for your QuickBooks CSV import:
Open QuickBooks Online and go to Accounting, then Bank transactions.
Choose the account tile, or start an upload if the account is not connected.
Select Upload from file and add the prepared CSV.
Choose the correct bank or credit card account in QuickBooks.
Match each CSV column with the correct QuickBooks field.
Review the transactions shown in the preview.
Select the rows you want to import.
Confirm the upload, then review and categorize the transactions.
Do not rush through the account-selection step. A clean CSV uploaded into the wrong bank or credit card account still creates a cleanup job. Intuit also advises users to review existing records before uploading so they do not create duplicate transactions.
Convert a PDF Bank Statement Before Importing
Sometimes the bank gives you a PDF statement instead of a ready-made CSV. In that case, you can use GoDocLab’s to extract tabular PDF data into a CSV file before preparing it for QuickBooks. GoDocLab’s current tool page says it supports PDF files up to 100 MB and exports the converted file as CSV.
This can create a useful starting file for a QuickBooks CSV import, but do not upload the raw conversion without checking it first. Bank statements often contain balances, page headers, account details, and repeated table headings that QuickBooks does not need as transaction rows. Clean the CSV so it matches one of the supported QuickBooks layouts before import.
What If the Bank Statement Is Scanned?
A scanned statement may store each page as an image instead of searchable text. If you cannot select individual words or transaction rows in the PDF, run OCR before trying to extract the data. GoDocLab’s makes scanned PDF text searchable and currently supports PDF files up to 100 MB.
After OCR, convert the table to CSV and check every important number against the original statement. A QuickBooks CSV import built from OCR data deserves extra review because character recognition can confuse similar-looking digits or letters. Pay special attention to dates, decimal points, minus signs, transaction references, and amounts.
Fix Common QuickBooks CSV Import Errors
QuickBooks may reject a CSV even when the file opens normally in Excel or another spreadsheet app. Intuit’s current error guidance points to problems such as incorrect column mapping, unwanted columns, formatting issues, and invalid transaction amounts.
If a QuickBooks CSV import fails, compare the file against the required 3-column or 4-column structure before trying random edits. Make one change at a time, save a fresh copy, and test again so you know what fixed the problem. Changing six things at once may work, but then the file has solved the mystery without telling you how.
Watch the File Size and Row Limit
Intuit’s US QuickBooks Online guidance currently says transaction-list upload files must stay at or below 350 KB and can include up to 1,000 transaction lines in one upload. These limits matter when you are bringing in a long history from a bank account or credit card.
If your QuickBooks CSV import file exceeds a current limit, divide the transactions into smaller CSV files without breaking or repeating rows. Keep the files in date order and name them clearly, such as 2026-Jan-to-Mar.csv and 2026-Apr-to-Jun.csv. Clear naming makes it easier to see what you already imported.
Avoid Duplicate Transactions
Duplicate transactions can appear when a CSV overlaps with data QuickBooks already downloaded from a connected bank feed. Intuit tells users to check their existing QuickBooks data before manual uploads and to review transactions after import.
Before each QuickBooks CSV import, identify the oldest and newest dates you actually need. If QuickBooks already contains transactions through August 10, do not casually upload another file that starts on August 1 without checking those rows. A ten-minute date check is easier than explaining why lunch apparently happened twice every day for a week.
What Happens After the Import?
Uploading transactions does not finish the bookkeeping job. Intuit says the next steps include matching or categorizing uploaded transactions and reconciling the account so the records agree with the bank.
After the QuickBooks CSV import, review payees, categories, transfers, and any matches QuickBooks suggests. Then reconcile against the bank statement for the same period. The CSV gets the data through the door, but review and reconciliation make sure it sits in the right place.
CSV Import vs Direct Bank Connection
A direct bank connection can download recent transactions automatically, while CSV upload gives you manual control over a chosen date range. Intuit says manual uploads help when a bank cannot connect or when you need older transactions from before the connection started.
A QuickBooks CSV import is therefore useful as a backup method and for historical data. If your bank feed already works well for current transactions, there may be no reason to replace it with repeated manual uploads. Use CSV where it solves a real gap rather than creating extra steps.
Final Check Before You Import
A good QuickBooks CSV import starts with a clean source file and ends with a careful review. Use the supported column structure, keep dates consistent, check amount signs, remove unrelated columns, select the correct QuickBooks account, and watch for duplicate date ranges. Intuit’s is the best place to confirm current QuickBooks requirements before a large upload.
If your source data lives in a bank-statement PDF, GoDocLab’s PDF to CSV tool can help move the table into a spreadsheet-friendly format, while OCR PDF can help with scanned statements. Those tools prepare the data, but QuickBooks still expects its own import structure, so clean and verify the CSV before uploading it. A little checking before import is much cheaper than a long afternoon repairing transactions one row at a time.
FAQs
Frequently asked questions
QuickBooks Online currently supports a 3-column format with Date, Description, and Amount, or a 4-column format with Date, Description, Credit, and Debit. Keep the chosen structure consistent and map each field carefully during upload.